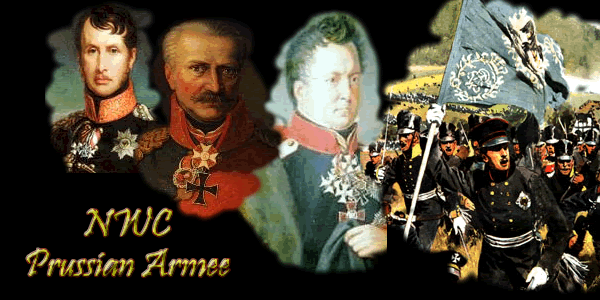
Preußische Armee Kadetten-Korps

As might be expected Prussian Army organization is the most logical of the three armies engaged in the 100 days campaign. It's also the best since the French & British/Dutch Armies have serious gaps in command structure which render important brigades permanently out of command.
The Prussian Army is divided into FOUR ARMY CORPS, logically numbered I, II, III, & IV. Each of those corps has four divisions, named BRIGADES in Prussian army nomenclature and numbered 1 through 16, 4x4 = 16, logical. Now, don't get confused because a Prussian Brigade = a French or British Division and because a Prussian Regiment = a French or British brigade. The individual infantry units themselves are referred to as BATTALIONS in all armies. So, each Prussian Brigade (= to a French division) consists of three REGIMENTS (= to a French brigade) and each of those three regiments consists of three BATTALIONS. Don't be confused now. Take a visual look at the organization on the map while you're reading this and you'll see it's logical. Four Army Corps (# I - IV), four Brigades (# 1-16) in each army corps, three regiments in each brigade, three battalions in each regiment. In addition, each Corps has an attached CAVALRY CORPS. Prussian cavalry will be discussed separately.
COMMAND : Army command begins with Field Marshall von Blucher and his Chief of Staff von Gneisenau. Those fellow's command rating (small c on the unit icon) are B and A respectively, which means Blucher has 5 chances in 6 (on a six sided die roll) to pass on his modifier to the next level of command (Corps) and von Gneisenau, 6 of 6. Their hex range is unlimited and so too for the Corps commanders, von Zieten, (I Corps) von Pirch (II Corps) von Thielemann (III Corps) and Bülow (IV Corps). All those fellows have unlimited range as well and your command problems only become tangible on the BRIGADE & REGIMENTAL LEVELS. Each of your Brigade commanders must be within 4 hexes of the Regimental commanders who must be within 2 hexes of their individual Battalions to pass along the modifiers, which by now, due to the concise and well structured Prussian command system, is 5 chances in 6 for a successful re-ordering of any disordered battalion, provided the units are in command.
I can't stress too much how important it is to maintain the command structure. This is the single most important aspect of TS Napoleonic wargaming. Once a unit disorders and is outside the appropriate command link, it will re-order 1 chance in 6 and you can wait a long time for that to happen; sometimes the whole game. Units become disordered sometimes when they pass through obstructed terrain, after melee and most often, when they take casualties during an enemy fire phase. In the enemy DEFENSIVE PHASE if your unit fails a moral check (6 sided die roll based upon your battalion's moral), it will disorder. LANDWEHR which have a moral of 3 will disorder on any roll higher than that. REGULAR INFANTRY, whose moral factors range from 3 to 5 will fare better. ELITE INFANTRY (moral of 6 & 7) will never disorder in an enemy defensive phase unless they suffer from high fatigue and/or are hit in flank . In an enemy OFFENSIVE PHASE, units always disorder if they take a hit and rout if they fail the moral check. So, LANDWEHR will rout on a roll of 4 or more, while ELITE will only rout if there are extra modifiers applied, for example, disordered units check moral with a +2 modifier, attacked in flank in another +2, so a disordered ELITE unit with a moral of 7 attacked in flank will have a cumulative +4 added to the die roll. So it's possible they can rout too.
STRUCTURE : Your biggest problems begin with I Corps since von Blucher felt it necessary to divide the command of I Corps to defend the area which was to receive the first French onslaught. Blucher didn't understand that 200 years later we would be computer wargaming his battle. If he did, he surely would not have placed so many of I Corps units out of command. So here is the problem. Do you abide by the historical placements for better or worse, or do you make adjustments? When you begin with Napoleon's deployments, everyone is in command. With Prussian I Corps, hardly anyone is. Blucher's choice of terrain here is impeccable but his deployments do not take into account the contingencies of computer wargaming. I think you should feel free to make some adjustments. Otherwise it's likely to be a long afternoon.
I CORPS : Major General von Steinmetz's 1st Brigade is all over the place: Some of it in Brye, the rest of it covering the approaches which cross the otherwise unfordable Ligne creek. What you do with this outfit depends upon how you want to defend St. Amand village. Me, I like to get all my battalions out of that death trap by putting them into column the first defensive phase and pulling out the first movement phase. BTW, it's important to use the scenario editor to create an unbroken skirmish screen to prevent immediate French infiltration right into the heart of the St. Amand village and Ligne town as well. Whoever designed the historical scenario must not have play tested it. The initial Prussian deployments in St. Amand village and Ligne town are, in game terms, completely unfair and unrealistic.
2nd Brigade: Generalmajor von Pirch II is pretty tight knit defending St. Amand Town which you can hold for a while. I like to use the scenario editor to rearrange Winterfeld's Landwehr Regiment to cover the approaches which cross the stream to the right of the town. He can get his battalions there before the French anyway, using the editor just means you don't have to bother with it. Since von Blucher decided to use Winterfeld's outfit to cover his right, we might expect they were rather crack troops; so I give each battalion a skirmish company (one of em already has one anyway). You might get that artillery battery out of the town before it's easily overrun.
3rd Brigade: Generalmajor Jagow is like von Steinmetz, all over the place. Just try to get as many of his boys out of the St. Amand village death trap as you can to link up with the rest of 3rd Brigade in Ligne town which is much more defensible than is St. Amand village. However, even if you get every battalion out of St. Amand village you still have problems because the French can roll 10 batteries of artillery into the village and completely control the terrain behind the creek with fire. They can surely melee through the bridges and establish bridgeheads. Any attempt you make to counter attack the bridgeheads will be met with heavy fire from the French guns. This unattractive option is why some players try to hold St. Amand village as long as possible.
4th Brigade: What a mess. What is von Schutter doing on hex 109-76? I guess he was there at 1430 on June 16, 1815 but you need to move him to where he's needed most. Take the two battalions that are over on that wing with him immediately to Ligne town. In Ligne, the fusilier battalion of von Schutter's 19th Regiment should make lots of skirmishers. BTW, you need to play this game with a modified oob which gives Prussian fusiliers the ability to make skirms. Otherwise, don't even bother to suit up. Another oversight by the original game designer.
The Silesian Riflemen: You have four large companies of Riflemen attached to I Corps: Two with von Lauren's 24 Infantry Regiment (1st Brigade) and two more attached to 3rd Brigade. These are real good boys and good shots too. Gather them up and put them someplace where can't be overrun by enemy cavalry and where they can get in 5 hex range shots at enemy arty (preferably) and infantry. Don't stack em together.
THINGS GET BETTER NOW.
II CORPS : is placed logically on the map, from west to east along the Namur road: von Tippelskirch's 5th Brigade, which has one small company of Russo-German riflemen, Generalmajor von Krafft's 6th Brigade which is the best outfit in your army, Generalmajor von Brause's 7th Brigade and finally Generalmajor von Bose's 8th Brigade which is another right fine outfit. How you use II Corps depends upon where you want to establish your main line of resistance (MLR) and significantly, how much of French I Corps is going to come up those roads on your right to attack your right wing.
Full Bull I Corps attack: Meaning 3 - 4 divisions of French I Corps with I Corps Cavalry and the heavy cavalry of III Reserve Cavalry Corps. Use the 5th Brigade to slow them down a bit at the Lake by Grand Ry. The attached cavalry can be sent in 25 man squadrons to the west as far as possible along with some skirms to occupy buildings and other rough terrain on the roads where they can't be overrun by French cav. Further back, the MLR needs to be the terrain between Brye and Marloyoux. There's a real nice ridge line there to place guns, lots of rough terrain, hedges and streams to hinder enemy cav and good roads to assist your movement. Don't let the enemy break through at Brye. If he does, you are through. You'll see von Blucher's original deployment placed some crack units in Brye as the wily Field Marshall had a keen eye for terrain.
Half or Quarter Bull I Corps attack. You should not lose the game to this and would do well to consider offensive action by II Corps on the right to turn the French left.
No Bull: The French commit I Corps against Wellington at Quatre Bras. Go on the offensive immediately and turn the French left with II Corps. IN ANY CASE you need to INITIALLY SHIFT II Corps to the right. Do this by advancing the 5th Brigade to the vicinity of the lake. The 6th Brigade, should be shifted north toward (but not to) Marloyoux where it can protect the flank as you never know how ambitious the French might be, and also where you can keep it safe as a final reserve. Station those boys on a road crossing where they can move in any direction and then forget about em. Shift the 7th Brigade to the area where the 5th was and the 8th to where the 6th was. Next, take the 9th Brigade of III Corps and move it to Sombreffe near where the 8th was. If you are a beginner, this would be your first experience with SHIFTING. It's a simple process somewhat like a dance. You can shift individual battalions of a regiment like this and regiments of a brigade like this too. In this way you can SHIFT the balance/weight of your army without disrupting its structure. If you can learn to successfully shift like this, you'll eventually have an edge over opponents who don't think this way. With this shift completed, which transfers the bulk of your army to the west, await developments and concentrate on defending your position with I Corps. This will reduce the number of decisions you have to make each turn. The fewer decisions you need to make, the fewer mistakes you make.
III CORPS : is a real interesting military proposition. You can attack the French with III Corps which is fun to try and if you're going to play this game more than once you probably will try it at least once. The roads will assist you but the terrain will not. There are very few lines of sight for guns and the hedged nature of the terrain makes cavalry action difficult. Still though, a III Corps attack might provoke French over-reaction by prompting the French to commit the Imperial Guard to assist IV Corps which is involved in the attack upon Ligne. If you can get this, III Corps will have done its job. Keep in mind however that once III Corps is committed to attack there's no turning back. Knowing that, you might opt to keep III Corps in reserve.
Generalmajor von Krauseneck's 10th Brigade is at the bend in the river and should advance to cover the bridge crossings with skirms. On the first turn put that Landwehr battalion in Boignee into column and march them home to the rest of the brigade. Make sure you cover the crossings at Tingrinelle and occupy the chateaux there. The French player is unlikely to do anything more than a diversion on this front but still, you don't want to be taken with your pants down. Also, if he wants to mess around with you here, make him pay. You have three batteries of horse artillery and one 6 pd. Battery which can dish out some real punishment. Pound em early here if he comes at you. You can always pull the guns out later when the French player yellow bellies out of there. Do not allow the French player to outflank you here. An aggressive Frenchman can probe far right (your left) and try to cross the creek unopposed. DON'T LET THIS HAPPEN!. Use what ever force it takes to punish any adventurism on that wing. Use the zugeteilte (attached) cavalry (in 25 man squadrons) to cover the bridges on your far left and if the French force their way across, counter-attack with lancers and horse guns. Your III Corps Cavalry has to stay on that wing for a major portion of the game anyway so don't be afraid to use em to protect the flank. The last thing you want is an unopposed crossing and French cavalry roaming around your rear areas. If von Krauseneck's 10th Brigade needs help over there, send von Luck's 11th Brigade Von Luck's 11th Brigade doesn't look like much but those 775 strength Landwehr battalions pack a powerful wallop when in line formation and good shock (melee) value when in column. Generally, don't underestimate the power of your many Landwehr battalions. Keep em in command and you will see that they are very tough boys.
Use Oberst von Stülpnagel's 12th Brigade to cover the crossing at La Pave. You only need the 31st . Infanterie Regiment (von Ketteloot) there. Use the regiment's fusilier battalion to make skirmishers and place the III Corps 12 pd battery on the high ground covering the approaches. The rest of 12th Brigade is kept on the road to move left or right depending upon circumstances. It may seem a waste of resources to use the whole of 12th Brigade to cover the single crossing at La Pave but if the French break through there, your army will be suddenly divided so don't take any chances here. Late in the game if the situation becomes desperate, you can move the two Landwehr regiments of 12th Brigade, and leave the 31st alone & out of command. You can do this here because you'll be defending the La Pave crossing with skirmishers and they function well disordered. Also by this time it should be clear whether or not the French intend to seriously attack La Pave.
Generalmajor von Borcke's 9th Brigade is another really fine outfit comparable to the 6th Brigade. Put the 9th on the main road at Sombreffe and this outfit should be used as a STRATEGIC RESERVE. Don't move them close to the front in the early going since you might then be tempted to involve them in solving minor tactical problems. As a strategic reserve, keep them free for use once you decide the general nature of your defensive strategy. The 9th Brigade should be the very last intact Brigade you commit to battle, i.e. your final reserve. Pray you never have to use em.
PRUSSIAN CAVALRY : There's a story, probably apocryphal, about the French player who won at Waterloo by never using his cavalry once. Since they are worth 8 times! the value of infantry you might keep this story in mind, especially considering that while Prussian cavalry is fine, you really don't have that much of it. There's two kinds of Prussian cavalry. There's the Zugeteilt cavalry which means literally attached to the Infantry Brigade: Keep em that way. Each brigade has one or two regiments of attached cavalry generally of low moral (3) and strength; 125. Keep them with the organization because they are good for scouting as they can create 25 man squadrons which can also come in handy to surround enemy units attacked by your infantry.
The real thang: Prussian Cavalry Corps. All I can say about these boys is that they are solid outfits and you don't want to be using them early in the game. III Corps Cavalry needs to stay on your left until the situation in the center/right has become so critical you feel you need to move them. So, in effect, III Corps cavalry becomes your final cavalry reserve. I Corps Cavalry should stay in the center where Blucher deployed them and bring II Corps Cavalry out from its confinement pen onto the east-west road. Remember, don't over-react to minor tactical problems with the use of cavalry. Keep them together because once you begin to detach Corps Cavalry those boys will be good for one charge and they'll never reorder. Fight with squadrons and keep the parent units behind. When the squadrons become fatigued, reincorporate with the parent unit to regain some fatigue. Right now I'm finishing a game (7:45 pm) with a very worthy opponent. I've lost 49,000 Prussian infantry to 39,000 for him. He's finally just broken through at Brye but I should be able to hold on for a major victory because I'm up 1000 VPs. The reason for this is he's lost 10,400 cavalry for 3,328 VPs to my 5,950 cavalry losses for 1904 VPs which is the difference in the game. The French army has so much good cavalry that most players become dependent upon it and tend to overuse it. Be careful (but not overly careful!) with your fine Prussian Corps Cavalry and you can win the game just on that.
PRUSSIAN ARTILLERY : You have plenty of artillery and me, I like to keep von Blucher's original artillery deployments intact especially the two 12 pd batteries atop the highest hill on hex 120-76. Those 18 hex range heavy cannon have good fields of fire in every direction and when the French approach Brye from the west you'll get in some good shots from here. The limbered cannon should be deployed as circumstances warrant but the map will show you a ridge line that runs from hex 120-74 to Marloyoux at 130 feet (or is it the hated meter) elevation. Plenty of good shots there for your gunners on the approaching I Corps. You have nine batteries of horse artillery and it would be a good idea to keep them near your Corps Cavalry. When you send those boys in, back em up with horse guns which can move, unlimber & shoot all in one turn.
FIRE COMBAT vs., SHOCK (MELEE) COMBAT: Since every battalion in your army is a big one, you should rely upon fire to defeat the enemy rather than shock combat. Shock combat seems easy but the units that engage in it rapidly lose effectiveness through the accumulation of fatigue. A unit in line formation can deliver a steady stream of effective fire for hours while a unit engaged in shock combat can be used up in less that one hour. Also, since your command structure is so solid I would be very wary of using my officers to positively affect the outcome of shock attacks. The +1 modifier is not worth the risk of permanently eliminating an officer who's capable of B command ratings (I do believe every Prussian officer attains this rating **they fluctuate** at various times throughout the game) to be replaced with Col. Anonymous rated F. Also, since your command structure is of such high quality, don't be afraid to operate with your infantry units in line formation. Move right through that obstructed terrain hex. Even when disordered, a 775 man Landwehr battalion in line will deliver heavy firepower. Your command structure will reorder them next turn providing not too many of your officers were killed leading charges. Generally, a good rule of thumb is to place units in line whenever the enemy is nearby and to keep at least one regiment of each brigade in column on a road (there are roads everywhere!) as a reserve for rapid movement.
The Prussian Army is, for me, the most intriguing and challenging army in the Napoleonic series to command. And the most fun too! I hope these tips will give you some help in figuring the army out and what to do with it.
E-mail: Eric2900@aol.com
© 2004-present