(Reprinted with kind permission from http://www.geocities.com/sixthdiv/HuntingDavout.html.)
This is another in my continuing series on strategies for the Campaign Eckmuhl game. This one concentrates on some basic principles of warfare that when violated nearly assure one of a major defeat, even in a game. Never being one to do anything halfway, when I've lost a battle it has been big and usually very quick. Actually I've become quite the expert, so for your enjoyment these are some of the crucial principles I used recently in a Hunting Davout scenario and how they helped me to lose so perfectly.
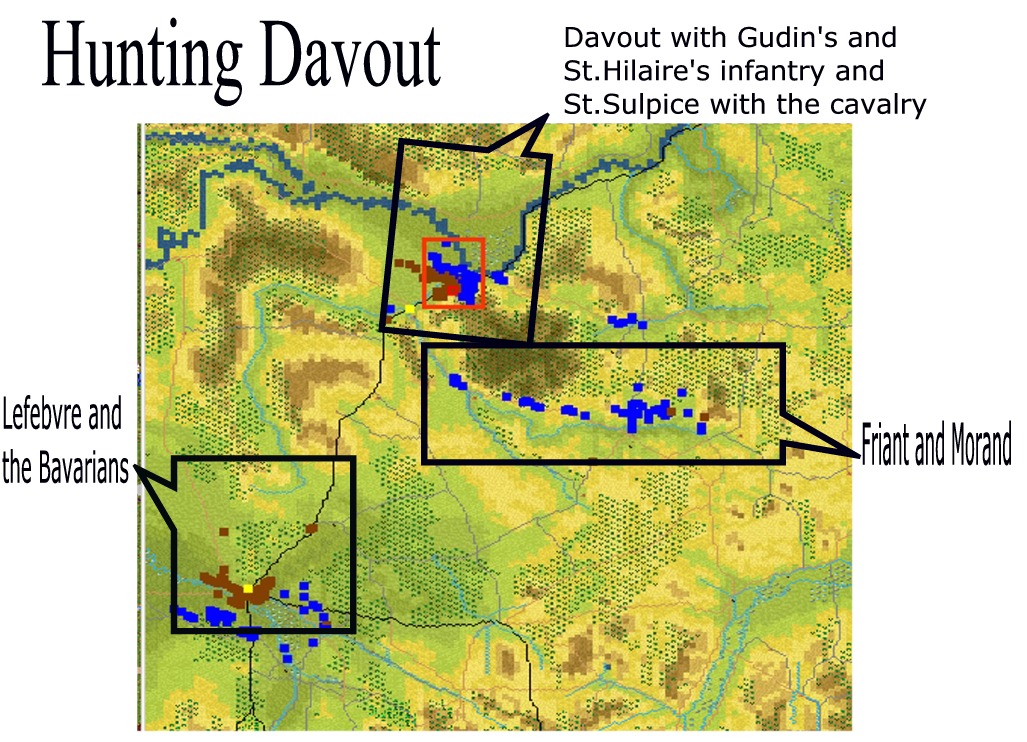
If I had stuck to the five simple principles above I could and should have won this scenario. I broke all 5 and paid the piper for it. My opponent here, Major Rick Martin of the Anglo-Allied Army, had previously defeated me through a series of scenarios in the campaign game until I was forced to yield the victory to him, as I was able to muster only 2-300 man battalions due to losses and stragglers. This was a stand-alone scenario, and I felt that with equal forces I would be able to inflict a serious defeat on him. As my forces began the battle on opposite ends of a very large map the strategy I decided on was to join my forces as soon as possible, or at least get them within supporting distance of each other. Overly excited by my dreams of surprising his forces and inflicting a massive defeat on the enemy, I did not take into account what actions he might take, and this led me to make some faulty dispositions. So, rather than fight two battles, I split my forces even further and then sent them out of supporting distance of each other (one large force chasing a mere squadron of cavalry across the countryside), bringing on three separate and distinct actions. Friant's, St. Hilaire's and Morand's divisions of infantry I sent along the inland main road through Teugen, Hausen, Mitterfecking and west to the rear of the village of Saal, which was also the northernmost objective hex. The Bavarians, I figured, could form a line south of Abensberg to hold the highway while simultaneously stepping to the east to outflank the heights behind the town. I sent the remainder of the III Corps south down the river road as sort of pinning and delaying force. This consisted of Marshal Davout along with Gudin's infantry and St. Sulpice's heavy cavalry division with the trains and artillery. This force turned out to be too weak for the task assigned to it, which was merely to protect the artillery and supply wagons.
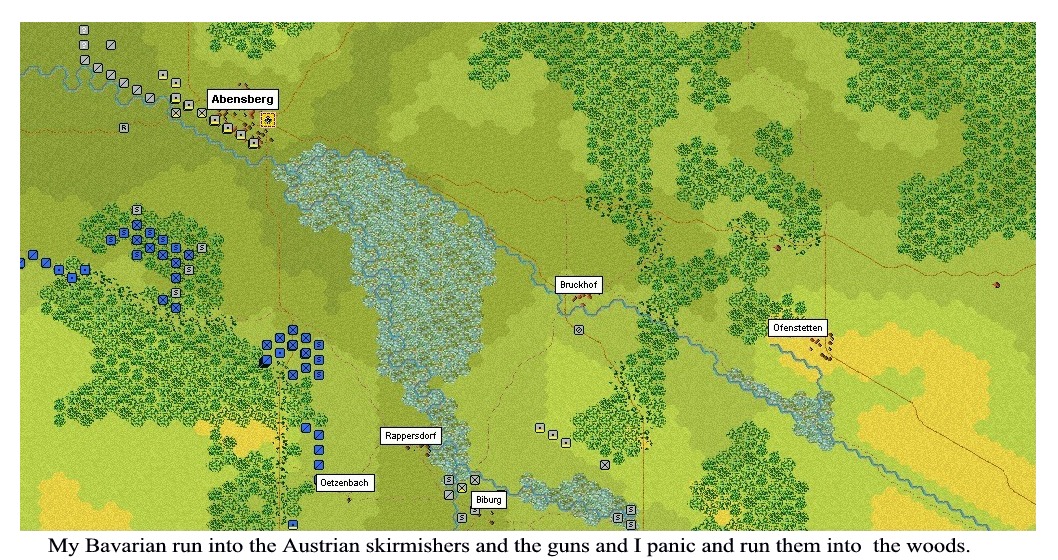

Let's begin with the Bavarians under Lefebvre, far to the south of the main
front. As they approached Abensberg and received some serious fire from a line
of guns the enemy had formed, I instantly pulled everyone back to the woods
instead of pressing their lines for a weakness, which is what was called for.
This adapting tactics to the situation was fine in itself, but I lost track of the strategy
of combining my forces. I should have kept to the east on the most direct route
to my other forces without having to fight. Of course, that would have made it hard to
lose, so I slowly worked my way around under cover carefully observing his forces.

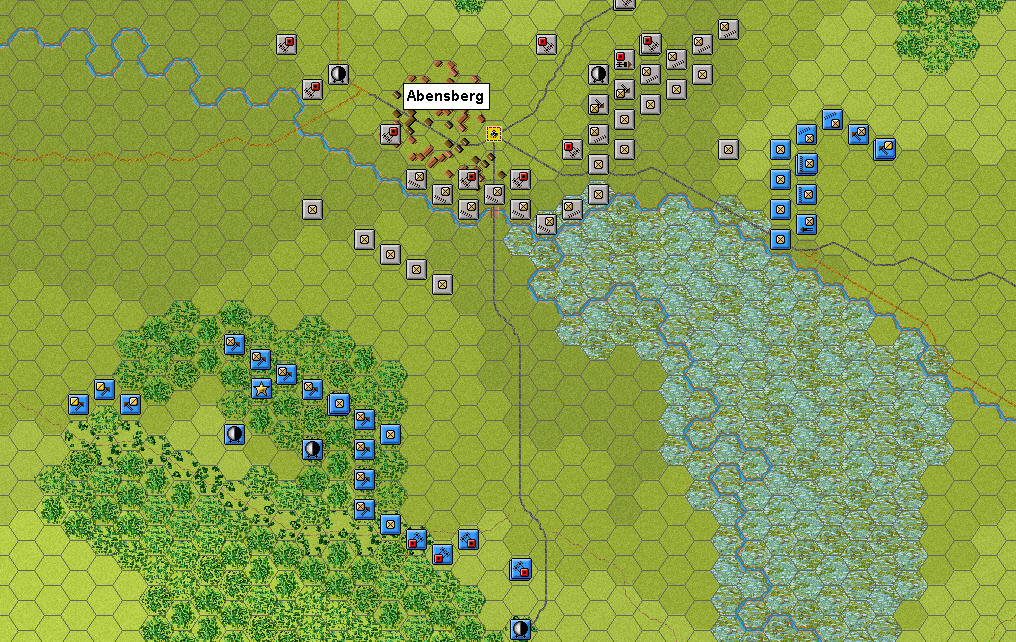 By the time I attempted to resume the advance it was too late, and luckily
opportunity had passed. He just pulled his men back and they reformed with the
rest of his troops. The only open route left was across country roads and
generally further away from my supports. This entire corps was wasted for the
entire crucial part of the battle. Meanwhile, the cream of the French army was
being shot to pieces 3-4 turns of clear movement away by the rest of Rick's
forces to the north.
By the time I attempted to resume the advance it was too late, and luckily
opportunity had passed. He just pulled his men back and they reformed with the
rest of his troops. The only open route left was across country roads and
generally further away from my supports. This entire corps was wasted for the
entire crucial part of the battle. Meanwhile, the cream of the French army was
being shot to pieces 3-4 turns of clear movement away by the rest of Rick's
forces to the north.
#2 Stick to your overall strategy.
I totally abandoned my strategy when only three
battalions routed, failing to march to the guns north of me.
#3 Attack, attack,
especially against a divided enemy force.
I did observe this one very well.
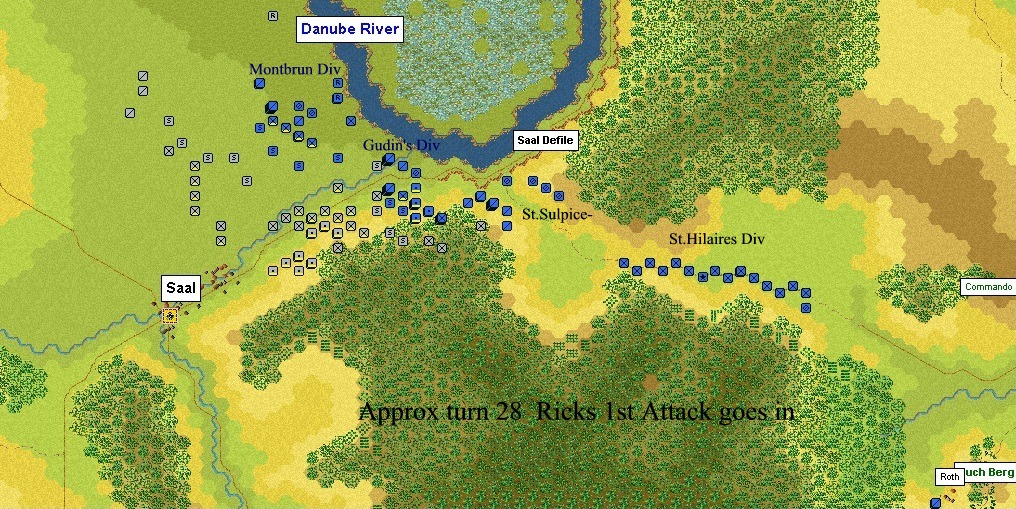
Next, let's deal with the crucial northern sector around Saal. Here is where I
ensured my defeat would be total. I figured that these forces, though small, could
slowly march along the river road until the inland force joined them in 4-5
turns. His infantry marched fast and seized the town of Saal,
which is the only
exit from the defile, and forced me to deploy Gudin's infantry and Montbrun's light
cavalry to form some sort of line until help could come.

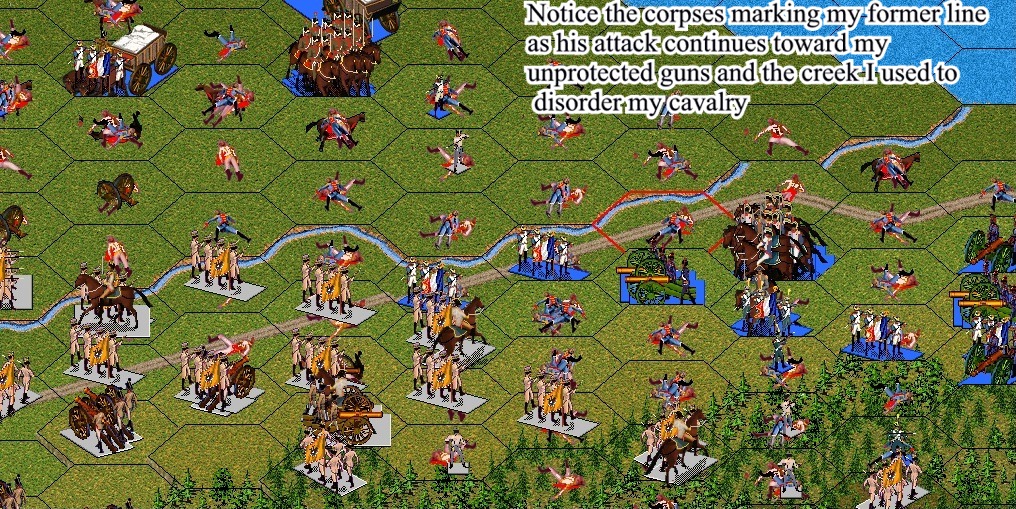
 This force and the gun
line I attempted to form were assaulted by 10-12 battalions, with some
8 or 9 batteries deployed to support them. My forces were caught in open ground with
enemy artillery having oversight of their positions, and no help within reach. Some
3,000 infantry and 1,200 cavalry were lost, along with some 35 guns. This
was the consequence of that bit of foolishness, achieved in less than 4 turns. But, St.
Hilaire's division recovered part of the position by attacking along the woods.
This force and the gun
line I attempted to form were assaulted by 10-12 battalions, with some
8 or 9 batteries deployed to support them. My forces were caught in open ground with
enemy artillery having oversight of their positions, and no help within reach. Some
3,000 infantry and 1,200 cavalry were lost, along with some 35 guns. This
was the consequence of that bit of foolishness, achieved in less than 4 turns. But, St.
Hilaire's division recovered part of the position by attacking along the woods.

 I then compounded the error by committing my heavy cavalry to slow his
pursuit, which cost me another 800 cavalry shot to pieces by infantry. Then,
even when I knew the attack had failed, I sat in front of his guns and launched
attack after attack. Dumb, Dumb!!
I then compounded the error by committing my heavy cavalry to slow his
pursuit, which cost me another 800 cavalry shot to pieces by infantry. Then,
even when I knew the attack had failed, I sat in front of his guns and launched
attack after attack. Dumb, Dumb!!
#1 Concentration of Force and effort.
St. Hilaire should have marched with
Gudin's division. The three turns it took him to catch up wouldn't have saved the
battle, but could have reduced my losses, especially in guns.
#5. Protect your guns and
supplies and an escape route.
I committed my cavalry across the creek with no
escape route. Once he deployed his guns, I was trapped.
#4 Save your cavalry
to win the battle and pursue.
Nothing more to be said about that...


Finally, the only portion of the battle that was going right was the battle near Teugen. Here I had more forces than I originally needed. I realized I should have kept my whole force in hand, so that the fear and panic I felt when I ran into his advanced forces could have been avoided. I sent Friant's division to the woods to the west of the ridge and Morand's division straight toward the enemy position.


With Morand's battalions pinning the enemy in place, Friant smashed in their
flank and began to encircle the enemy a battalion or two a time. As they were
deployed in line formation, as they began to disorder their speed of movement
dropped quickly in the woods, and even more were enveloped and captured.
Eventually some 9 battalions were captured in this manner, but as I was
distracted by reports of events around the Saal defile I began to disengage most
of Friant's division and send them to support our position to the west.

 When
he exposed a support line of 10-12 battalions to the rear, I was left with an
equal number of fatigued and disordered units, and so was unable to exploit the
success.
I was able to cause some 4-5000 casualties at a cost of 2500 men but
found myself no closer to overall victory. All I accomplished was prolonging my
defeat from turn 15 to turn 34. #1 Concentration of Force and effort.
When
he exposed a support line of 10-12 battalions to the rear, I was left with an
equal number of fatigued and disordered units, and so was unable to exploit the
success.
I was able to cause some 4-5000 casualties at a cost of 2500 men but
found myself no closer to overall victory. All I accomplished was prolonging my
defeat from turn 15 to turn 34. #1 Concentration of Force and effort.

Turn 18
Turn 34
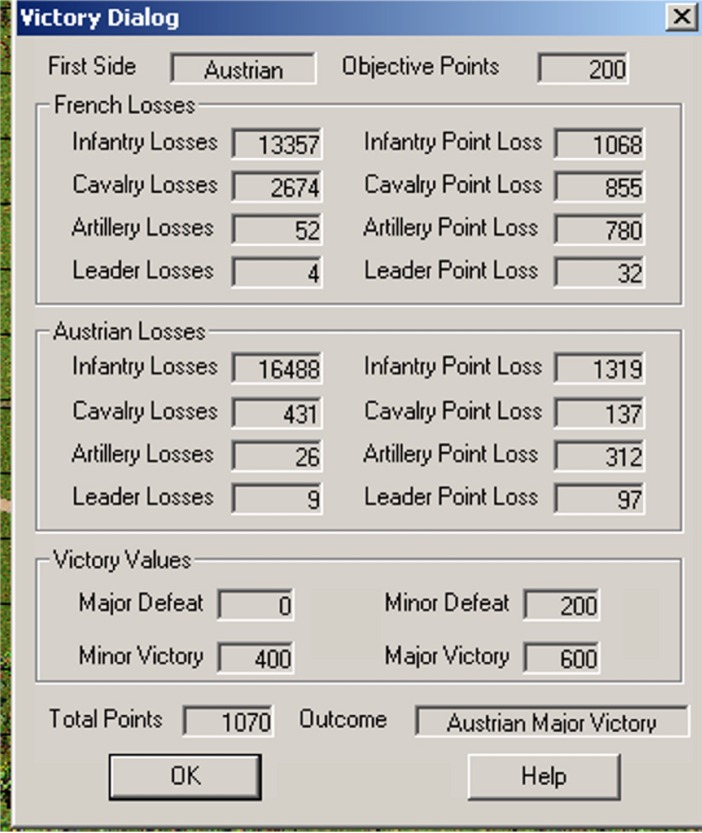
Now I have suffered some 13,000 infantry losses and 2700 cavalry with 47 guns and his losses are around 15,000 infantry and 200 horse and only 12 guns. This is a major defeat; not much chance of making that up in the 11 turns left, and I dont anticipate him making any big mistake this late in the day.
Coming soon: An article on my 100 Days campaign in one scenario versus Gary Hobbs, AdC Russian Army, who forced me to make some really foolish moves with some wild cavalry raids in my rear.